meta name="p:domain_verify" content="83432fc69a1d6df071f49df584f9d839 Laurl Designs: owl and thistle
Showing posts with label owl and thistle. Show all posts

Friday, January 9, 2015

New Twine collection from Owl and Thistle

I am super excited about my new Mid-Winter twine collection on Owl and Thistle! It is the Metallic Neutral collection and it's full of golds, silvers, creams and greys.
These novelty twines can be found HERE!
It is a mix of metallics and neutrals that looks great with kraft paper gift wrap and perfect for white paper.


But it is not limited to gift wrapping! Here's a round-up of great ideas from across the web to use twines with.

Fantastic altered book from Phizzychick

Or this cute Christmas card book. Instructions from Honey Bear Lane found here!
Novelty twines are a great accent mixed with yarn on a wreath like this from Family Chic by Camilla Fabbri
Post image for DIY Mini Wreaths: A Guest Post From Catherine Rising
Metallic neutral twines are perfect accents for a tiny wreath from Free People Blog
Wouldn't this little wreath be great on wedding reception tables!

Sunday, November 30, 2014

handmade holiday gift wrapping with paper doilies

handmade doily gift bows
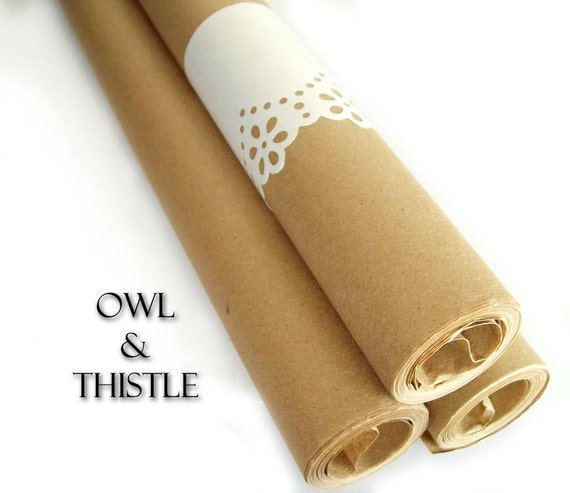
I love coming up with new ways to use doilies as gift wrap! Today's project is a silver bow that is "lined" with the doily. The double sided cones  gives the bow extra sparkle and is super easy to make! Here's how.

This project uses kraft paper as a base wrap and two sizes of silver doilies to make the bow. Easy wrapping at it's best!

You will need:
kraft wrapping paper
4 inch silver or gold doilies
5 inch silver or gold doilies
tape and/or hot glue (low temp glue for safety)

Wrap you package in kraft paper and collect four silver 4-inch doilies and  four silver 5-inch doilies.


Fold the doily in half making sure to match the pattern for the neatest look.


Then, make a cone with one side of the folded doily and tape it place (tape the folded edge from the inside of the cone).

Next, make a cone with the other half of the folded doily by folding it in the opposite direction and taping. Continue making the cones with the rest of the doilies.
Place the four largest cone pairs in a cross on your package (you can tape or hot glue these in place).


silver doily gift wrap
Then place the four smaller ones together, again tape or hot glue, and add them to the center of the cross.

Silver doily gift bows
Pretty and pretty easy! This project also works great with 5 and 6 inch doilies or, for really big packages, 6 and 8 inch doilies!

Tuesday, December 3, 2013

Brown paper packages tied up with string...


These are a few of my favorite gift wrapping things! And, I happen to sell them in my Etsy store (www.owlandthistle.etsy.com).


The brown paper is flying out of the store!Kraft wrapping paper- 30 foot roll - great for wrapping gifts - 24 inches by 30 feet


The string comes in a variety of options!

Pink Bakers Twine - 25 yards of each color - 75 total
Baker's twine in shades of pink.

Tuesday, August 20, 2013

Sunday, August 11, 2013

DYI Doily Wedding Envelopes and Liners- the how-to

I have been selling 10 inch square paper doilies in my Etsy shop, Owl and Thistle, for a couple of years, mostly to brides who are DIY-ing the invitations. I made the assumption that there was great instructions on the web to make them. So, when a customer asked for the instruction, I went to the web to find a blog to give her the link... and I could not find one that used the 10 inch doilies and made a simple envelope. So, here is how to make a simple paper doily envelope liner!

The Basic Paper Doily Envelope Liner

Supplies needed-

10 inch doilies
a cutting tool (I used my fave vintage paper cutter purchased from Etsy)
a bone folder (for creasing paper)
card board
a type of adhesive (double stick tape, envelope glue)


The bone folder is the small tool on the top. My doilies always include two sheets of the cardboard I have used in this post as protective packaging. So, if you order my doilies, you get the cardboard that you can cut down to the size you need. You could also use a cereal box, but be careful not to transfer the ink to the doily when you are using the bone folder.

{:~:} TIP 
     10 inch doilies can be used for an A7 invitation (5" x 7") or a 6" square invitation. Both sizes follow the same method so for illustrative purposes, I'm only showing the A7 size.

Step 1:
   Cut the cardboard to size for your template. For an A7 envelope, your template should be 5 and 1/4" by 7 and 1/4". For a six inch square, your template should be 6 and 1/4". It us fine if you cut your slightly smaller, just do not go any larger.


Step2:
   Place your doily pretty side down with your template centered on the doily.
{:~:} TIP 
     Look for the embossing to see which is the correct face to place down.

Face down with template


Note that the space for "a" and the space for "b" are equal. 


Step 3:
   Fold the side flaps to the center, snugly. Then use your bone folder to press the folded edge down firmly. Your goal is to ensure the crease will stay, but not to tear the delicate doily.

It does not matter which side you fold from first.

Firming press the folded edge with the bone folder.


{:~:} TIP
     You can use the rounded handle end of a dinner knife in lieu of the bone folder.

Step 4:
   Fold the bottom flap up to meet the side flaps and, again, use the bone folder to press the folded edge down firmly.


Step 5:
   Fold the top flap down to meet the bottom flap and press with the bone folder.


Step 6:
   Open the top flap back and bottom flaps back to add the double stick tape, or the envelope adhesive to the points of the side flaps. Add the adhesive to a location where the most solid pieces meet. Arrows are for suggested adhesive placement.


{:~:} TIP
     If you are using envelope adhesive or Elmer's glue, add a hair dryer to your tools. The glue takes about a minute to dry and the dryer will speed that time up.

Step 7:
   Slide the template carefully out of the envelope and close the top flap! You have completed one envelope.


Step 8:
   Now that you have an envelope, it is time for a dry run. Try to slide your invitation inside the envelope and then to slide the envelope into the outer envelope.

Was the envelope too snug or too loose? You can adjust the template for either by trimming or adding tape to each edge to slightly enlarge it.

If you feel the doily is too delicate, you can start with a  10-inch square of velum on the inside of the doily (between the doily and the template) and follow the above steps. Just make sure you stick the velum to the doily in the adhesive step.

Now that everything works, cut a duplicate templates and invite those bridesmaids over to help fold the rest of those envelopes.


Did you discover a tip you would like to share on this project? Please add it in the comment section!


Friday, February 15, 2013

fun with paper doilies

Paper doilies are an easy way to update gift wrap, invitations and envelopes. You can find a great selection of doilies at www.OwlandThistle.etsy.com - everything from 4 inches to 12 inches and rounds to squares to hearts!

I use the Martha Stewart folding board to make doily envelopes and tri-fold invitation wrappers. It's an easy tool that gives you exact measurements.

Below are some of my doily creations! 
 
10 inch square doilies make an A7 envelope or 6 inch squares!
 
Small rectangle doily makes a tri-fold wrapper!
 
gold doilies cut to decorate a pillow box. Instructions are here!
 
 
4-inch white doilies look great on manila tags. Instructions are here!
 
 
This was a quick shot for a customer. It's a 10-inch doily wrapper on a 5x7 invitation!


Thursday, July 26, 2012

Back to School: The Dorm - tastic freshman room

I had the best dorm room on campus when I was in college- a large corner room in the dorm with bathrooms in the room. Though the dorm was on the periphery of campus and had gross light green metal furniture, the attached bathroom trumped everything else. I made a quilt for my bed the summer before my freshman year from a dress with a full skirt and a coordinating fabric that was purchased at the time the dress fabric was purchased.
To celebrate the back to school spirit and the joys of leaving home... combined with the sadness of missing home. I have collected a group of dorm must haves for that first year of college. Hopefully the rising freshman will find some great ideas to help bring a bit of home with them to school.

Pair of Bookends, Pushing Men
Kindles and Nooks are great, but you will probably have some real books, too!
Pair of Bookends, Leaning Ladies
Great for future heroines, drama queens and art deco fans. The leaning ladies book ends.
Dorm Room Decor or Wall Art - Personalized Roommate and College Gift - Printable (Keep Calm Theme))
Fun signage for the dorm door or as a reminder for when deadlines get tight and dances are coming up!
Duvet Cover - Dorm Bedding - College Bedding
Pink and Green and Happy! Great dorm collecting of duvet and pillows!
Bright Pink Dinosaur Planter Bright Pink Allosaurus
Ferocious, that you! Attacking homework, devouring books, dominating on the Dean's list.. no? Not you? How
about dominating in your dining hall, devouring rush week and ferocious in your school colors!  Plants help
to clean the air, which is nice in a dorm and succulents are easy to care for.

5 vintage look kraft paper clothes pins - hand painted black, papered and beautifully finished- ready to ship
Pin notes, keep up with papers, decorate your bulletin board! Clothes pins are also handy for clipping bags closed!
Dorm keys, car keys, or lab keys- you have to keep up with them! Great to start the new school year
and perfect for the college care packages from Mom! Great gift for you roommate, suite mates, or sisters!

USB Hubman, Pink
This little guy will be the best college boyfriend you'll ever have! You can never have enough plugs...
Maybe you are like Mr. Weasley and you collect them! This would be a great addition to the collection.