meta name="p:domain_verify" content="83432fc69a1d6df071f49df584f9d839 Laurl Designs: wedding reception ideas
Showing posts with label wedding reception ideas. Show all posts

Friday, January 16, 2015

Doily chargers or placemats

I am so often asked if my 12 inch doilies would work for a place mat or charger for wedding tables. And they do! Such a pretty, lacy edge around a 10 inch plate. They would be great as a whimsical addition to a Summer party, graduation party, or Mother's day tea!


So, I thought I would set up a simple table settings with new china and my Grandmother's antique china for comparison. All of these pieces are standard size- plates are 10 inches. The silverware is antique, so not the large restaurant size flatware.

Please click HERE to order you gold doilies!

Standard 10 inch plate with a salad plate on top

Standard 10 inch plate on 12 inch doily, such a pretty edge!

Grandmother china on 12 inch doily- place setting with soup bowl


Grandmother's china on 12 inch doily- simple place setting

Saturday, January 26, 2013

DIY: Valentine's Doily tags

Doily tags are a steady seller in my Etsy store. They work well for gift tags on brown paper packages as well as place cards and wedding decor! They would be so cute as a garland mixed with doilies for a wedding or baby shower! Though I am happy to make them for you, you can make them yourself. Here's how!


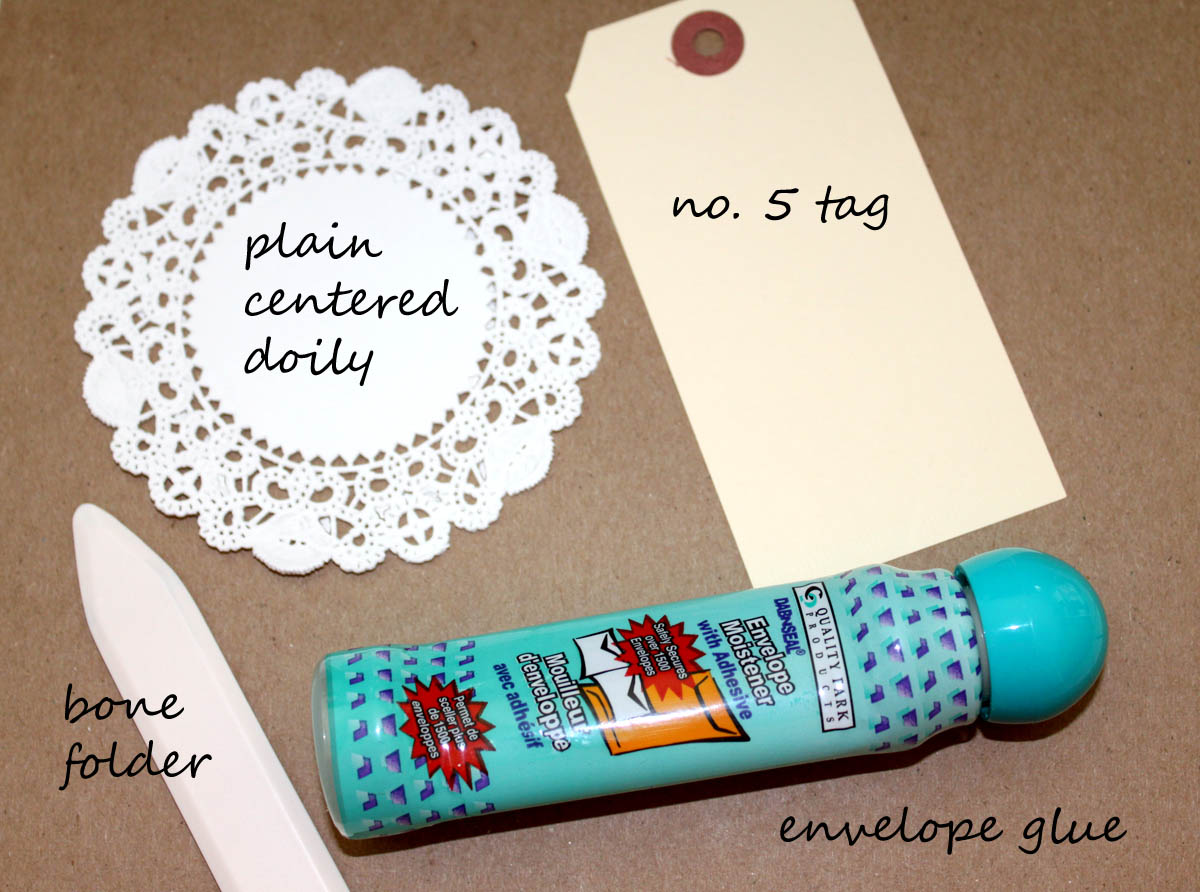
Start with shipping gift tags, English 4 inch doilies, a bone folder, and envelope glue (or your preferred general purpose glue, Elmer's works too. It is just a bit runny). Optional equipment includes very clean slightly stiff paint brush and heavy items like bottles of glue, staplers, steel scissors, pattern weights, etc.


Begin by separating your doilies and removing any "chads" still stuck in the filigree  I like to use the stiff paint brush to remove the chads by pushing the bristles into the shads and brushing them off from the back. Once the doilies are separated, place the doily on the tag as shown below and fold the doily around the tag.


Using your bone folder, press a crease into the doily from the back. Use the flat part of the bone folder, so you will not tear the doily. I have shown my Martha Stewart bone folder, which has a sharp beveled edge. Other bone folders have a smooth bevel, which I prefer. However, this was the one close at hand!


From the back of the tag, you now have fairly solid spots to glue from. Place the sponge tip on the inside of the solid piece of the doily and then press the glued side to the tag. Repeat on the other flap. I like to lay the doily face down on my work table and weight the glued edges until they dry.


Now you are ready to use your tags for gifts, wedding notes, place cards, table number tags... you name it!


Want to pin these Instructions to Pinterest? Here's a quick step-by-step perfect for pinning!


Monday, January 7, 2013

popular on Pinterest this week

Pinned ImageI never know what I am going to pin on Pinterest that will be a repin blow-up. This week it is an image of a group of Moroccan tea glasses on a mirrored tray. They are pretty colors with light gold filigree detailing on the glasses. Moroccan tea is served hot and is either green tea or a mint and is served all day. These pretty glasses would be great showing off the desired foam that forms on the top of the tea from the distinct pouring method, as well as a sweet boutique or a single stem of hydrangea.


I love using my Moroccan tea glasses for flowers! But they are not just for tea and flowers, these are great with tea lights in them! They would be a great addition to wedding decor for the bridal couple that wants to add some ethnic patterns and colors to the reception.