meta name="p:domain_verify" content="83432fc69a1d6df071f49df584f9d839 Laurl Designs: gold doilies
Showing posts with label gold doilies. Show all posts

Friday, January 16, 2015

Doily chargers or placemats

I am so often asked if my 12 inch doilies would work for a place mat or charger for wedding tables. And they do! Such a pretty, lacy edge around a 10 inch plate. They would be great as a whimsical addition to a Summer party, graduation party, or Mother's day tea!


So, I thought I would set up a simple table settings with new china and my Grandmother's antique china for comparison. All of these pieces are standard size- plates are 10 inches. The silverware is antique, so not the large restaurant size flatware.

Please click HERE to order you gold doilies!

Standard 10 inch plate with a salad plate on top

Standard 10 inch plate on 12 inch doily, such a pretty edge!

Grandmother china on 12 inch doily- place setting with soup bowl


Grandmother's china on 12 inch doily- simple place setting

Thursday, April 3, 2014

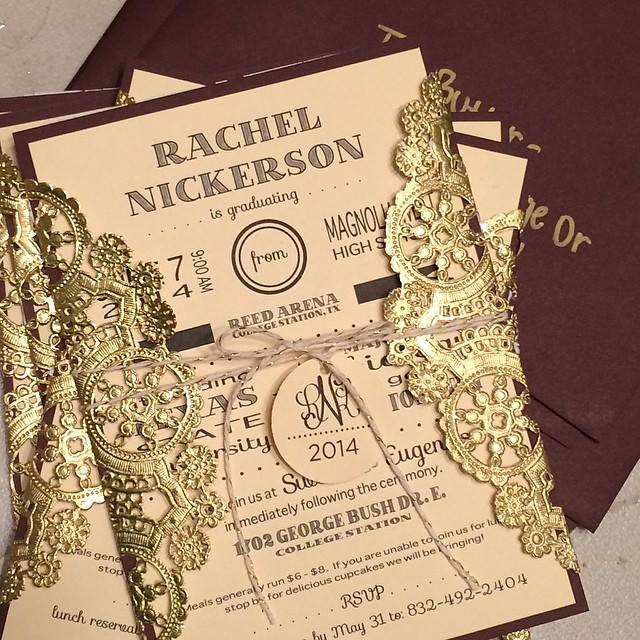
invitation designs- doilies for graduation invitations

I love to see how people use my doilies. Today, I received a nice email from a customer who shared her graduation invitation design that used a gold doily as a wrapper. Really handsome!


I think they are great! You can find her paper flower designs in her Etsy store- Julie Lynn Designs!

Wednesday, January 30, 2013

Great crafting- gold doily pillow box

My weekly great crafting adventure features gift wrapping with some of my Etsy store items.

This great little pillow box is simply decorated with a gold doily. You could easily substitute a silver, white or black doily!

The best part of this design is that it is clean without a bow so it is easy to pack and carry.


Here's what you need:

pillow box
gold doily
glue
scissors

Start with peeling apart the doilies- they always come in sets of 3,4, or 5 sheets per group.

Cut the doily in half. The doily is symmetrical  so you can find the design on the opposite side and aim for it with your scissors.


Fit the doily over the end of the closed box.


Trim around the design to produce smooth edges that look intentional.


Fold the trimmed ends around the box and glue the trimmed ends to the box. Also, glue the edge of the doily to the edge to the box flap.


Finally the finished box, ready to be filled with your pretties!

Ready to pin the instruction? I've made it easy, you the image below to pin for quick reference!




Friday, December 7, 2012

Holiday gift wrap - The 12 Wraps of Christmas

As my other business is selling gift wrap and crafting supplies on Etsy, I thought I would blur the lines between interior design and craft for the 12 Wraps of Christmas. 12 days, 12 different package ideas in a handy pinterest friendly version!


Gold foil doily pillow box is as ease as peel, cut, form, trim! I used double stick tape to glue the doily in place, however you could use glue stick, hot glue or just a roll of tape!