meta name="p:domain_verify" content="83432fc69a1d6df071f49df584f9d839 Laurl Designs: wedding
Showing posts with label wedding. Show all posts

Sunday, September 8, 2013

Ice dying- time for a class project

Fabric dying, for me, is as magical as Raku pottery to me and I can do in at home...

I am excited to announce a new venture with Do-It-Yourself Crafts in Homewood where I will be teaching classes in dying and felting! They will be super fun, perfect for making holiday gifts, and centrally located with many options for classes and class times!

My first class will be following the hot trend of infinity scarves combined with ice dying. This fast paced class will take you from a plain rayon jersey infinity scarf to one full of your favorite color!  Take the class to try it out, them com back for an "open" session where you can do multiples.

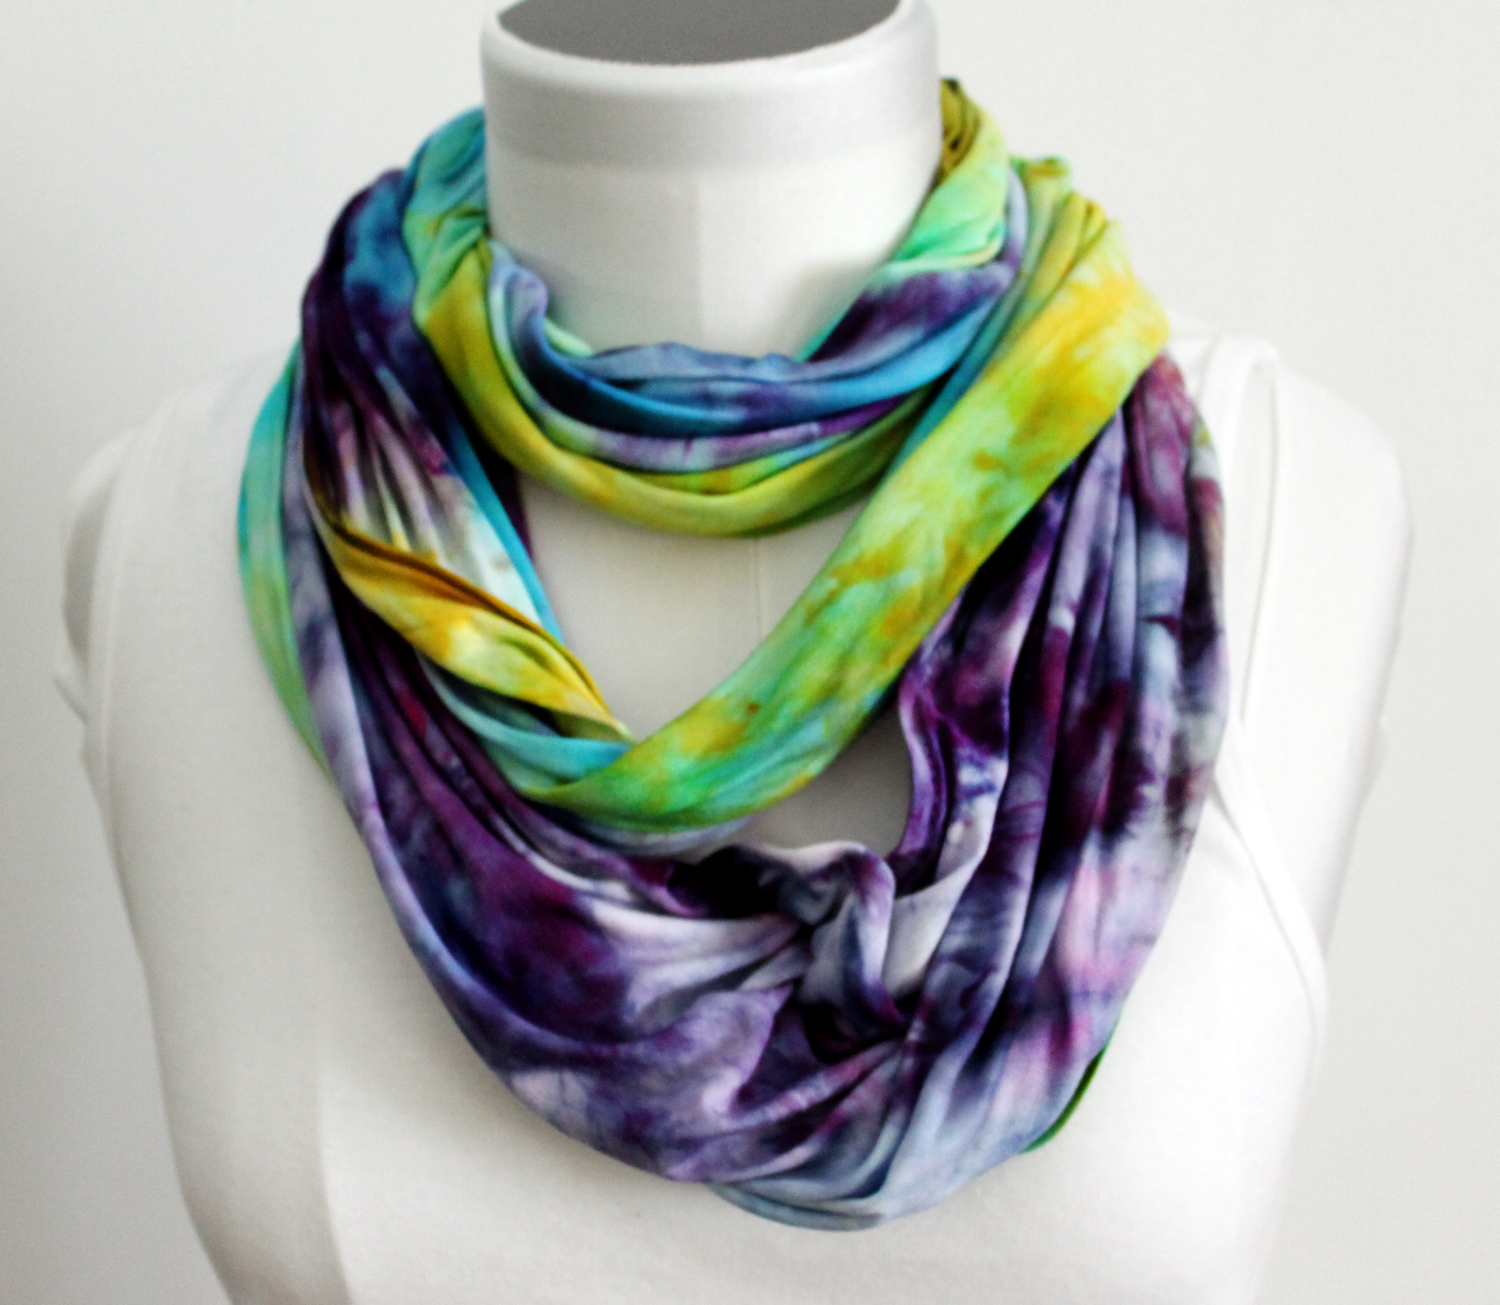
Here's my photos of  the ice-dying project you will be making. Of course you can pick your own color palette.

once the ice melts the dying is done and the waiting begins!

what I love about the process is the unexpected nature of it. This scarf is made using purple, turquoise and lime green. Due to the variations in the dye components, other unexpected and lovely colors can erupt! The golden yellow is unexpected, but lovely, nonetheless! 


The info on signing up for one of my classes... or all of them!

The Schedule: 

Monday September 16 10 a.m. Beginning Ice Dying - Circular Scarf $45
Wednesday September 18 10 a.m. Basic Nuno Felting - long silk scarf $54
Monday September 23 6:30 p.m. Beginning Ice Dying - Circular Scarf $45
Wednesday September 25 6:30 p.m. Basic Nuno Felting - long silk scarf $54
Saturday September 28 10 a.m. Felted Soap Creations - for KIDS aged 10 and older! $12 first bar, $10 each additional bar
Monday September 30 6:30 p.m. Advanced Ice Dying - several choices of items (will be explained at beginning class)
Wednesday October 2 6:00 Free Form Felting - $72 
Wednesday October 9 4 p.m. OPEN STUDIO FELTING AND DYING Price will vary by garment, some beginning class will need to have been taken!
Friday October 11 10 a.m. Nuno Felting and Dying $70


The classes will  be held at Do-It-Yourself Craft

1909 Oxmoor Road
Homewood, Alabama 35209

Phone: 205-868-4346
Hours: Monday thru Saturday 10am-6pm
Sunday 12-5pm 

Sunday, August 11, 2013

DYI Doily Wedding Envelopes and Liners- the how-to

I have been selling 10 inch square paper doilies in my Etsy shop, Owl and Thistle, for a couple of years, mostly to brides who are DIY-ing the invitations. I made the assumption that there was great instructions on the web to make them. So, when a customer asked for the instruction, I went to the web to find a blog to give her the link... and I could not find one that used the 10 inch doilies and made a simple envelope. So, here is how to make a simple paper doily envelope liner!

The Basic Paper Doily Envelope Liner

Supplies needed-

10 inch doilies
a cutting tool (I used my fave vintage paper cutter purchased from Etsy)
a bone folder (for creasing paper)
card board
a type of adhesive (double stick tape, envelope glue)


The bone folder is the small tool on the top. My doilies always include two sheets of the cardboard I have used in this post as protective packaging. So, if you order my doilies, you get the cardboard that you can cut down to the size you need. You could also use a cereal box, but be careful not to transfer the ink to the doily when you are using the bone folder.

{:~:} TIP 
     10 inch doilies can be used for an A7 invitation (5" x 7") or a 6" square invitation. Both sizes follow the same method so for illustrative purposes, I'm only showing the A7 size.

Step 1:
   Cut the cardboard to size for your template. For an A7 envelope, your template should be 5 and 1/4" by 7 and 1/4". For a six inch square, your template should be 6 and 1/4". It us fine if you cut your slightly smaller, just do not go any larger.


Step2:
   Place your doily pretty side down with your template centered on the doily.
{:~:} TIP 
     Look for the embossing to see which is the correct face to place down.

Face down with template


Note that the space for "a" and the space for "b" are equal. 


Step 3:
   Fold the side flaps to the center, snugly. Then use your bone folder to press the folded edge down firmly. Your goal is to ensure the crease will stay, but not to tear the delicate doily.

It does not matter which side you fold from first.

Firming press the folded edge with the bone folder.


{:~:} TIP
     You can use the rounded handle end of a dinner knife in lieu of the bone folder.

Step 4:
   Fold the bottom flap up to meet the side flaps and, again, use the bone folder to press the folded edge down firmly.


Step 5:
   Fold the top flap down to meet the bottom flap and press with the bone folder.


Step 6:
   Open the top flap back and bottom flaps back to add the double stick tape, or the envelope adhesive to the points of the side flaps. Add the adhesive to a location where the most solid pieces meet. Arrows are for suggested adhesive placement.


{:~:} TIP
     If you are using envelope adhesive or Elmer's glue, add a hair dryer to your tools. The glue takes about a minute to dry and the dryer will speed that time up.

Step 7:
   Slide the template carefully out of the envelope and close the top flap! You have completed one envelope.


Step 8:
   Now that you have an envelope, it is time for a dry run. Try to slide your invitation inside the envelope and then to slide the envelope into the outer envelope.

Was the envelope too snug or too loose? You can adjust the template for either by trimming or adding tape to each edge to slightly enlarge it.

If you feel the doily is too delicate, you can start with a  10-inch square of velum on the inside of the doily (between the doily and the template) and follow the above steps. Just make sure you stick the velum to the doily in the adhesive step.

Now that everything works, cut a duplicate templates and invite those bridesmaids over to help fold the rest of those envelopes.


Did you discover a tip you would like to share on this project? Please add it in the comment section!