I have been working with my sister on her kitchen remodel and we are starting to see some results! We began with keeping the original layout of the cabinets and island because the problem was not the layout but the actual cabinets. So, new cabinets, counter tops, lighting, colors, and back splash. Left to do is paint, electrical, window drapery and a bit of jzuzsh-ing.
Here's a shot of the progress!
Note that you can see the other side of the kitchen in the windows, and there is an island in between. Creamy white cabinets, white Moroccan arabesque tiles, black counter top with a hint of copper sparkle.
Showing posts with label moroccan. Show all posts
Friday, May 2, 2014
Wednesday, March 6, 2013
painting tips for stenciling
I am working on a Design Trifecta-a pink and orange, ethnic inspired, chalkboard stencil! The pic on the left look a bit more purple than the actual wall.
It looks great so far and all that's left is to chalk it. The chalking is the last step that give the wall a patinaed look. The nice part about Hudson Paint's Chalkboard paint in the low to no oder, durability and easy cleanup. With painting an entire and stenciling and wall, I used many designer tricks to complete the project. I compiled some tips on painting stencils below.

Clean up tip: One of my best tips!
I like to place my paint tray in a plastic bag and when the painting is done, I can simply lift the bag off, turn it inside out, and all my paint mess in contained. It leaves me with a clean paint tray and saves water from having to wash the tray- with is a trade off with the plastic bag. I can also use the bag to wrap my roller in and save the wet roller to use again in the next few hours for the next coat!
Chalkboard tip #1:
The instructions say to use a 1/4 inch nap roller, which is for very fine finishes. I used a 1/4inch "mohair" roller for the body color of the wall and for the stencil, I used a 2 inch wide sponge roller. This allowed for an even coat and for hitting all the details without needing to pour out lots of paint.
Chalkboard tip #2:
Large stencils can be difficult to paint without allowing for drying time after each stencil. And when painting a large section of wall, this can be time consuming. Here my easy tip. Use the registration marks on the stencil to map out the entire wall. Measure and mark, then measure and check your marks! Once everything aligns, then you can stencil one section and skip the next all the way down the wall. Once the first pass is completed, go back and stencil the spots you skipped. The registration marks allow for perfect alignment and by running two passes the first is dry enough not to smear!
Stencil tip:
stencil adhesive! You can spray the back of the stencil with stencil adhesive and turn your stencil into a giant sticky note! or you can use re-positionable tabs in the back to make the stencil stick to the wall without lots of tape. Both methods are very helpful when you are painting alone.
Fashion tip:
OK, it's not really fashion, only kind of... I do not wear shoes when I paint, unless I am doing ladder work. Why? Because if I drip paint and step in it, I know. It is cold. However, if I was wearing shoes, I would not feel it and possible track it around the flooring. Barefootin'. It is the best way to paint!
It looks great so far and all that's left is to chalk it. The chalking is the last step that give the wall a patinaed look. The nice part about Hudson Paint's Chalkboard paint in the low to no oder, durability and easy cleanup. With painting an entire and stenciling and wall, I used many designer tricks to complete the project. I compiled some tips on painting stencils below.

Clean up tip: One of my best tips!
I like to place my paint tray in a plastic bag and when the painting is done, I can simply lift the bag off, turn it inside out, and all my paint mess in contained. It leaves me with a clean paint tray and saves water from having to wash the tray- with is a trade off with the plastic bag. I can also use the bag to wrap my roller in and save the wet roller to use again in the next few hours for the next coat!
Chalkboard tip #1:
The instructions say to use a 1/4 inch nap roller, which is for very fine finishes. I used a 1/4inch "mohair" roller for the body color of the wall and for the stencil, I used a 2 inch wide sponge roller. This allowed for an even coat and for hitting all the details without needing to pour out lots of paint.
Chalkboard tip #2:
Large stencils can be difficult to paint without allowing for drying time after each stencil. And when painting a large section of wall, this can be time consuming. Here my easy tip. Use the registration marks on the stencil to map out the entire wall. Measure and mark, then measure and check your marks! Once everything aligns, then you can stencil one section and skip the next all the way down the wall. Once the first pass is completed, go back and stencil the spots you skipped. The registration marks allow for perfect alignment and by running two passes the first is dry enough not to smear!
stencil adhesive! You can spray the back of the stencil with stencil adhesive and turn your stencil into a giant sticky note! or you can use re-positionable tabs in the back to make the stencil stick to the wall without lots of tape. Both methods are very helpful when you are painting alone.
Fashion tip:
OK, it's not really fashion, only kind of... I do not wear shoes when I paint, unless I am doing ladder work. Why? Because if I drip paint and step in it, I know. It is cold. However, if I was wearing shoes, I would not feel it and possible track it around the flooring. Barefootin'. It is the best way to paint!
Labels:
chalkboard,
design tips,
interior design,
lace,
laurl designs,
Laurl Self,
moroccan,
pink and orange,
stencil,
techinque
Wednesday, January 30, 2013
Brassy- bad for your hair, great for your home
No one wants to hear that their hair in Brassy. But for the home, brass is hot! The current hot patina has a brown cast, but it can patina into some beautiful colors. My personal favorite is a purple-y taupe with the golden undertone. I have a great selections of types of tray, from ashtray to coffee table. All from Etsy! You can click on the word "Brass Tray" under any of the pictures to take you to the item to purchase!

Brass Bamboo look tray 12 inches!

Huge 36 inch Moroccan Brass Tray. It is the perfect ottoman topper!

Patina, Patina, Patina! This is fantastic! 25 inch brass tray- love the colors.

Pretty vintage Moroccan Tray, 17 inch!
Want more? Click HERE to find all the brass trays you could want!
| Brass Mid Century Flower ashtray. The petals are removable for personal ashtrays! Crazy, but cool. |
| Mid-Century 10 inch brass tray, not too big, not too small! |
Brass Bamboo look tray 12 inches!
Huge 36 inch Moroccan Brass Tray. It is the perfect ottoman topper!
Patina, Patina, Patina! This is fantastic! 25 inch brass tray- love the colors.
Pretty vintage Moroccan Tray, 17 inch!
Want more? Click HERE to find all the brass trays you could want!
Wednesday, July 25, 2012
More More Moracco
I have been following the design trend of Moroccan designs for a couple of years. With the inclusion of more tribal prints and Moorish design entering the market place, now is a great time to start on the front of the trend. Early adopters tend to get more bang out of the style and have the opportunity to live with the trend longer that middle and late trend adopters.We are still on the early side so let's look at some great items to add a bit of Moorish to your living space!
Hallmarks to look for- repeating patterns, geometric patterns, white with intense brights like royal blue, and arabesque patterns!
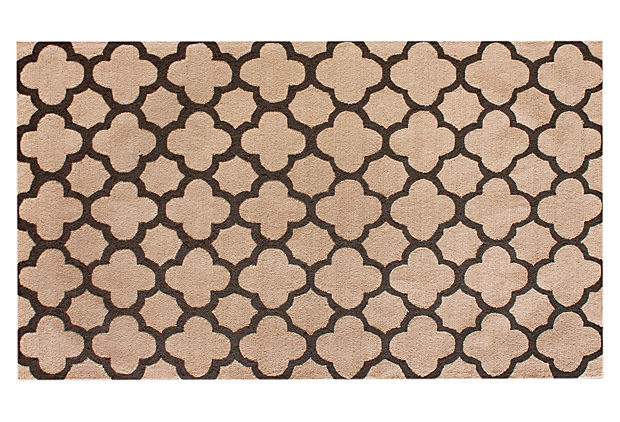
From One Kings Lane Flat-Weave RugsNeid Trellis Rug, Tan/Chocolate |
| Moorish Mango side table- great modern interpretation of Moorish design |
| Egyptian Moroccan Mother of Pearl side table |
| Moroccan Shade pendant light |
| Large Moroccan pendant light |
| Jennifer Delonge Moroccan Pouf in Metallic Gold |
Labels:
bergere chair,
design trend,
home decor,
home design,
lantern,
laurl designs,
Laurl Self,
moorish,
moroccan,
moroccan pouf,
rugs,
trending
Subscribe to:
Posts (Atom)