meta name="p:domain_verify" content="83432fc69a1d6df071f49df584f9d839 Laurl Designs: #ecoliving
Showing posts with label #ecoliving. Show all posts

Sunday, July 10, 2016

Papads and the Microwave, your next food obsession

I recently purchased a lot of cherries... I mean they were about $1.00 per pound, how could I not! So I am off to the races on making cherry based dishes- mostardas, chutneys, scones, etc. However, I was out of  black and yellow mustard seeds. So, on the to-do's this weekend was a visit to the always intriguing, Indian Spices store in Hoover. At Indian Spices, I am bound to find what I need and a few things to try. Today's "try" was a doozie of deliciousness!!! 


I had no idea exactly what I was buying, not uncommon in a store where about half the products have English names. I bought what I thought was called Khichiya. After all, it is the first word at the top. But according to the internet, they are called papad- the rice version of papadums. 


 I could read rice crackers and chili garlic. So, I thought that they were, you know, crackers, chili garlic crackers. I didn't read the light green box, with the instructions to see that you have to cook them, until I got home


So, off to the internet to see which method works best for me. My options were deep frying, open flame, microwave and oven. I found a video of a couple microwaving them and I riffed on this idea. He spread oil on one side with a ladle. I used my trusty silicone sauce brush and a little oil on both sidesThey are outstanding. Really outstanding. They are crunchy, airy, and strong enough to use with a dip. You know that feeling you get from eating pork rinds, where they start feel a bit sticky, but dry on your lips, especially after a few. This has that same feeling. In other words, lip-licking good. So, you want some? Read on!


Pour a little oil, I use organic canola, in a bowl and with your brush, paint both sides with the oil (you can be stingy with the oil). Then, place two or three on a paper towel in the microwave and set for 30 seconds. You will see them start to puff from the edges to the center. Carefully remove from microwave, they will be hot to the touch as will the oil on the outside and add them to your snack bowl. I tried a couple of waves of this and got up to 5 "crackers" in the microwave at the time. You have to watch them because the will burn like microwave popcorn, if you are not careful.


What do you do with these airy puffs of delish? I ate them like chips. But, I think they are to be eaten with a meal. And are they hot, you ask, well after a few, you notice the heat! 


TIPS:


1. Since you will probably not cook all of them at one time, you can put the rest in a resealable bag and cut the label off of the original bag to go inside. This is especially important if you buy more than one flavor... and now that you know how to cook them, you will want all the flavors.

2. You could probably even use an aerosol oil, but I don't normally have any. The plain ones would probably be good with a brushing of coconut oil- for you sweet and salty-ers!

Sunday, July 3, 2016

French Butter Crocks- a Southern girl's best friend!

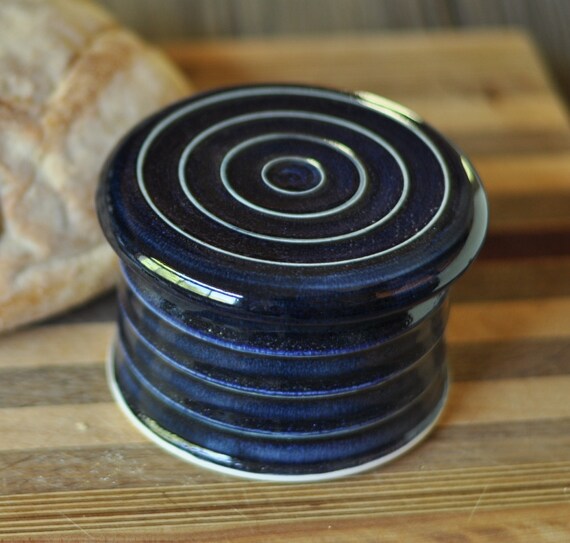
French butter crocks are one of the best gifts from France, next to the Statue of Liberty. Also known as butter bells, French butter keeper, and burrier, this two part ceramic container keeps butter fresh at room temperature. That's right, this stays on the counter or on the table! 


How does it stay fresh, you ask? Easy and very low tech, the water touching the butter creates a seal against air. When butter comes in contact with air, it starts to oxidize causing off-flavors. Limit the air contact and you limit the oxidation.


The outer container holds water and the lid with the bell holds butter- keeping the butter fresh and cool. And as any Southern girl knows, cold butter can break our light and delicate biscuits. 


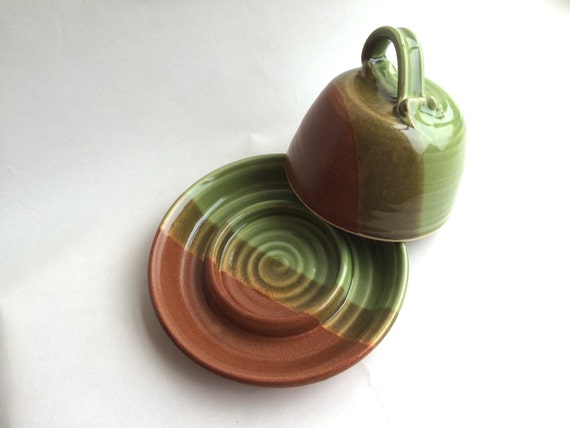
When shopping for butter bells, look for one that is glazed on the inside can and hold at least a stick of butter. My favorite one allows the lid to fit upside down in the base for easy table use. (see below)


You can find butter crocks at outdoor art shows and galleries. They are a mark of a good ceramic craftsman's skills! Handles on the lid makes it much easier to use, if you have small hands.


From Ceramic Arts Daily


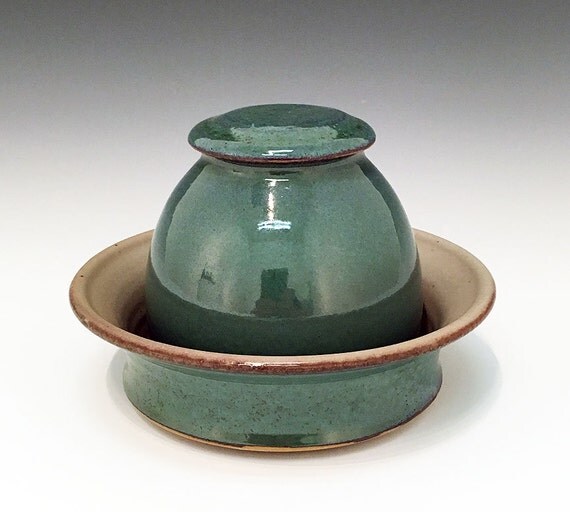
In case this seems like you might always have wet butter, I have another option for you! This French Butter Keeper (below) has a water well that the lid sits in and the butter is raised above the water. This does not keep the butter as long as the water sealed butter keeper, but you never have water droplets on the butter!


Find it here!


To keep your butter the freshest, wash your keeper in the dishwasher between every couple of butter changes and change your water every few days.


Fine it here!
Large Handmade Stoneware Butter Keeper
This big butter keeper holds 3/4 of a pound of butter. Fine it here!
The "never gets wet" butter keeper. Find it here!


Friday, July 1, 2016

Lemon and Rosemary Pink Himalayan Salt rub

I love making easy, homemade gifts. They are perfect for everything from stocking stuffers and secret santas to backyard barbeques and hostess gifts. Plus, they are just plain fun! Perhaps you will skip this year's cookie swap and host a condiment and seasoning swap. Homemade mustards, salts, vinegars, and jams can save you from some sinfully delicious eating and create some delish new recipe ideas!

I adapted this recipe from Here and Now contributer, Kathy Gunst's recipe for Seasoned Sea Salt (you can find the original recipe here).

I think these little hermetically sealed jars are so pretty! The lemony and lightly resinous rosemary flavored salt can be used for fancy table salt or a delish rub for pork on the grill! The Pink Himalayan Salt combined with the lemon yellow and pale green of the rosemary is summer in a jar.

Recipe:
2 cups of Pink Himalayan Salt
1 tablespoon dried Rosemary
Zest of one lemon

Pre-heat oven to 200 degrees (or your low/keep warm temperature). Combine all ingredients in a parchment lined cookie sheet and bake at 200 degrees for 30 minutes. Stir every 10 minutes. After 30 minutes, let cool on the parchment and pour into sealable containers. Use your parchment as an easy funnel!
The salt helps to keep the lemon zest and rosemary dry. This jar will keep for 4-6 months, if you don't run out of it first.