I am super excited about the 1920's armoire I scored this weekend! It is in rough condition with a giant hole in the back and some junky "half a job", as my mom would say, shelves. So, it is perfect for a real revamp.
The previous incarnation was to house a TV. As it enters it's centenarian years, it is moving into the 21st century as a computer armoire. It is the perfect size for a small home office. The redesign will include a new back with holes cut for power cords, a writing surface as well as a pull out drawer for a keyboard or a laptop, some LED lighting in the "ceiling" of the cabinet, and maybe a cubby or a slide out spot for the printer.
The piece has great bones, now it just needs an ergonomic redesign and some paint!
Here's the homely lass now...
Got any paint color suggestions?
Saturday, August 31, 2013
Sunday, August 25, 2013
My Lemon Fig jam- where happy accidents and delicious meets
The first time I made Fig jam, or maybe it was called preserves, I could not decide if "1 slice lemon" was "1 slice of lemon" or "1 sliced lemon." I like lemon, so I sliced a lemon thinly and added it.
I realized at the end of the recipe, when you were to discard the slice, that they intended a much smaller amount of lemon. However, that was some delicious jam- sweet, lemony, and fig-licious.
Since that first recipe, I have continued to add lemon... a whole lemon diced.

I am not a canner who likes to make 8 quarts of anything at one time.
Too much pressure to eat it all and too much produce to acquire.
Beside, I like to have a variety of condiments so I small batch and cut down or alter recipes to make smaller quantities.
If you like to make 8 quarts, you are welcome to enlarge the recipe.
On to the recipe!
 My happy accident Lemon Fig Jam
1 to 2 cup sugar (depends on how sweet you like it)
2 pounds figs
2 lemons
Remove stems from the figs and cut each one in 4-6 pieces.
Slice lemons, removing seeds, and dice in about 1/2 inch pieces or smaller.
Makes about one pint (I use two half pint jars)

Add figs, lemons and sugar to and enameled pan and cook for 2-3 hours.
The jam should be thick, but will thicken more when cooled.
And even more after sitting a spell in the fridge!
 While the jam is cooking, sterilize the canning jar, in the sterilizing cycle of the dishwasher, or fill you largest pan 2/3 full of water, bring to a boil and add the jars to the water to completely submerge for 5 minutes. Remove with tongs to a clean towel to rest and cool. Add canning rings to the boiling water to sterilize as well. In a small pan of boiling water, add the canning jar lids and leave on a low simmer.
 I do not truly can these with a full on water bath, I store them in the refrigerator. However, when you store food for an extended length of time, you should sterilize your jars for safety.
Lastly... and this is the really hard part... you need to wait a week before you start enjoying you new jam. The lemon makes it a bit bitter (think strong orange marmalade- like maybe Dundee brand), after a week they will mellow considerably. Typically, I have a little left over that I can enjoy in the mean time. I like the bitterness of the lemon and enjoy it equally after a week or so.
If you do not like bitter, just use your microplane and jest the lemons, then peel off the white pith (where the
bitter flavor is) and chop the lemon pulp.
Friday, August 23, 2013
Montevallo Art Walk
Saturday, tomorrow, August 24th from 5 to 8 is Montevallo Art Walk in down town Montevallo. I am excited to be setting up my booth in from on the new Barnes and Nobles. I will be selling...
Labels:
art show season,
art walk,
hair ties,
initial,
keychain,
Montevallo,
outdoor art show,
silk scarf
Wednesday, August 21, 2013
Outdoor art show season- top 5 things I learned!
It is the fall outdoor art show season again and I am prepping to see and to show. I spent last fall attending shows and learning. I feel like I learned many things last season to bring into this season. I thought I would share
My top 5 things I learned about selling your art at outdoor shows.
Paypal credit card reader fits in your phone/ipad and records payments in your paypal account.
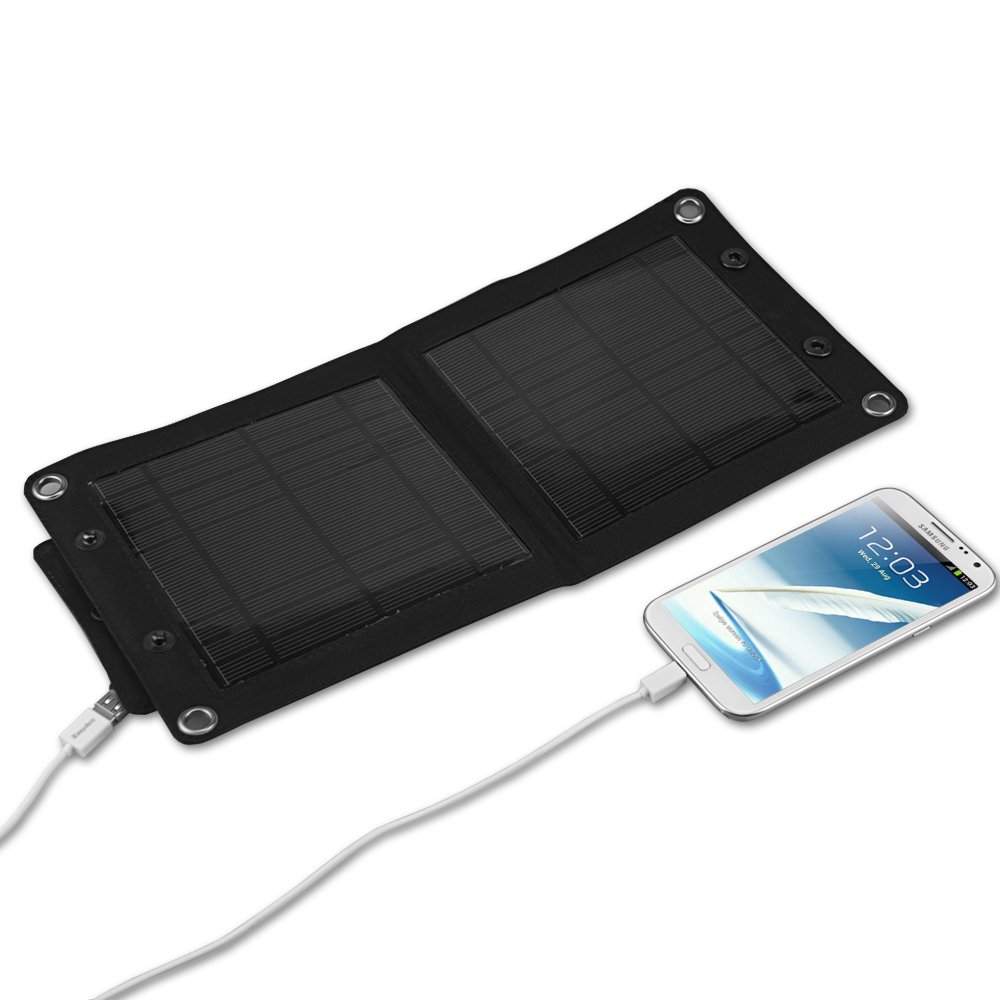
I would suggest a solar charger- instant gratification and no batteries to remember to charge.

I use the Undercover 10'x10' Commercial Popup Canopy with Carry Bag and walls. The carry bag even has wheels!

Come see the Moss Rock Festival... I'll be there!

Hopefully your list will be shorter.
My top 5 things I learned about selling your art at outdoor shows.
1. Make payments easy!
Bring $100 in cash in small bills. Take credit cards via square or Paypal, I bring both devices for my phone in case one of the systems is down... and get the pen to use with your phone or ipad.Paypal credit card reader fits in your phone/ipad and records payments in your paypal account.
2. Technology is important- bring a charger!
Let's hope you have so many sales that you run down your battery on your phone. So, plan ahead and bring a charger. Also, wear a watch to prevent your self from turning on your phone to check the time.
I would suggest a solar charger- instant gratification and no batteries to remember to charge.
3. Good tents make good set-up.
Buy a good tent, make sure it is one you can put up easily. Buy it in white, most shows don't specify, but you are in trouble if you cheap out with a blue tent and you have to rent a white one for the show.
I use the Undercover 10'x10' Commercial Popup Canopy with Carry Bag and walls. The carry bag even has wheels!
4. Bring a buddy.
At least for one day of the show. They can help you set up, break down, or at least give you a break to see the show. And though it is a great show that has great booth sitters, a booth sitter doesn't care as much for your success as a friend or family member.
Come see the Moss Rock Festival... I'll be there!
5. Roll like Santa- make a list and check it twice!
You need a list with everything you need to bring, remember to do, and pack in the car. Start you list about a week before the event and put the list somewhere that it is easy to make notes on it. Otherwise you will forget your water, cash, to charge the phone/ipad, etc.
Hopefully your list will be shorter.
Bonus tip:
You can only sell as much as you bring to sell. If you only bring $1000 worth of merchandise, then you can't sell any more than $1000. Don't limit yourself. Bring more than you ever think you can sell, you might surprise you.
Labels:
art show.,
check list,
outdoor art show,
planning,
selling art,
things I learned,
tips,
top 5
Tuesday, August 20, 2013
Front page feature on Etsy!
View an Etsy Front Page Treasury List - The Vault on Craft Cult
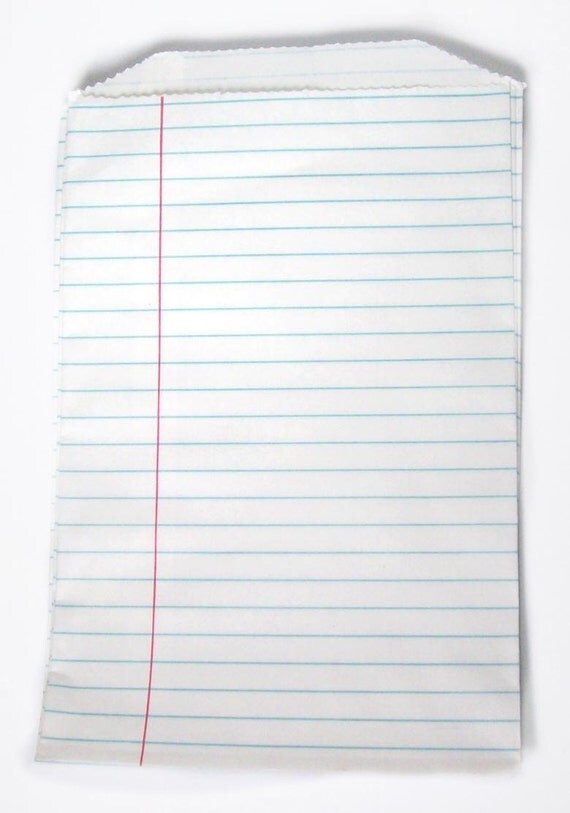
My cute notebook paper gift bags were on the front page of Etsy today!
Thursday, August 15, 2013
My hottest pin from Pinterest
I love that Pinterest speaks to my analytical side, as in, "will others like this pin" or "how many repins will this get" or which of my pins this week will be the hottest. My answer for this week is...

I think they are stenciled, or maybe it is netting lace. The screens are from outside the US, in a place where they do not have screens on their windows, normally, like we do. This looks so cool, I'd consider replacing, or stenciling, as the case my be.

I think they are stenciled, or maybe it is netting lace. The screens are from outside the US, in a place where they do not have screens on their windows, normally, like we do. This looks so cool, I'd consider replacing, or stenciling, as the case my be.
Labels:
cottage,
cottage chic,
European windows,
floral,
lace,
laurl designs,
netting,
screen,
window coverings,
windows
Quick college care package!
I love the idea of a college care package. Just because you text, email, and talk on the phone, doesn't negate the power of a gift in the mail. A little something to say "I'm with you", "you're special", "I believe in you" can be as simple as a card or more lavish with a gift card, pack of hair ties, or handmade pin inside.
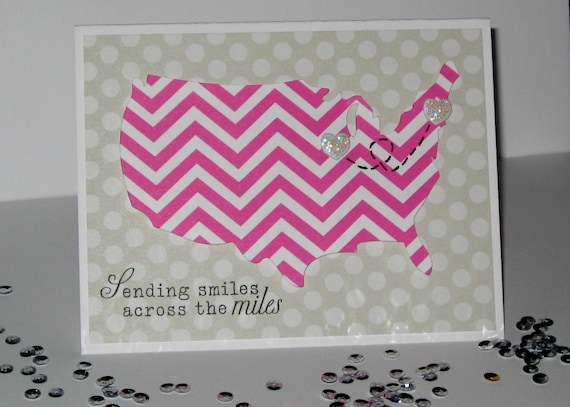
Card from Glitter Ink Card on Etsy.
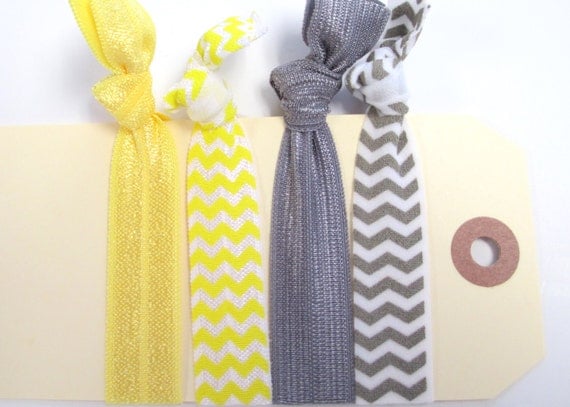
Hair ties from Gillion Million on Etsy.
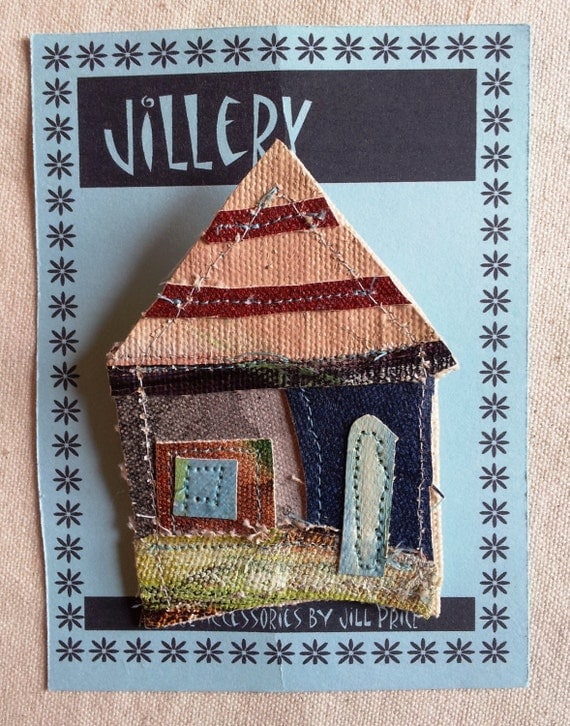
Textile art pin from Jill Price Studios on Etsy.
Or a bank filled with quarters for the vending machine or laundry is a great reminder of support. The bank below would also be a great way to say congratulation on becoming a Chi Omega, since owls are their symbol.
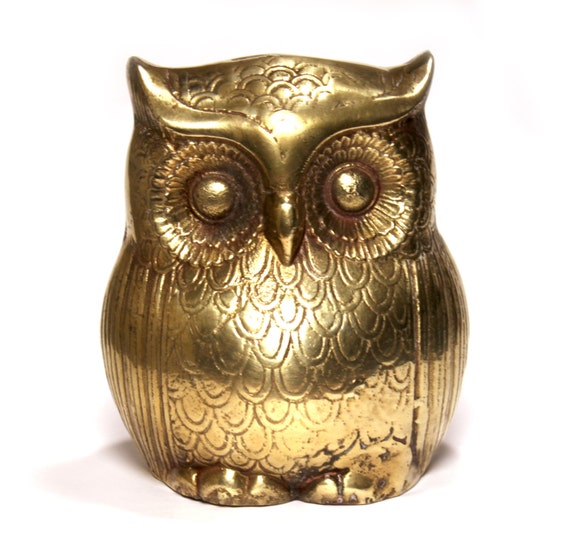
Owl coin back from Porch and Parlor on Etsy.

Card from Glitter Ink Card on Etsy.

Hair ties from Gillion Million on Etsy.

Textile art pin from Jill Price Studios on Etsy.
Or a bank filled with quarters for the vending machine or laundry is a great reminder of support. The bank below would also be a great way to say congratulation on becoming a Chi Omega, since owls are their symbol.

Owl coin back from Porch and Parlor on Etsy.
Sunday, August 11, 2013
DYI Doily Wedding Envelopes and Liners- the how-to
I have been selling 10 inch square paper doilies in my Etsy shop, Owl and Thistle, for a couple of years, mostly to brides who are DIY-ing the invitations. I made the assumption that there was great instructions on the web to make them. So, when a customer asked for the instruction, I went to the web to find a blog to give her the link... and I could not find one that used the 10 inch doilies and made a simple envelope. So, here is how to make a simple paper doily envelope liner!
The Basic Paper Doily Envelope Liner
Supplies needed-

10 inch doilies
a cutting tool (I used my fave vintage paper cutter purchased from Etsy)
a bone folder (for creasing paper)
card board
a type of adhesive (double stick tape, envelope glue)
The bone folder is the small tool on the top. My doilies always include two sheets of the cardboard I have used in this post as protective packaging. So, if you order my doilies, you get the cardboard that you can cut down to the size you need. You could also use a cereal box, but be careful not to transfer the ink to the doily when you are using the bone folder.
{:~:} TIP
10 inch doilies can be used for an A7 invitation (5" x 7") or a 6" square invitation. Both sizes follow the same method so for illustrative purposes, I'm only showing the A7 size.
Step 1:
Cut the cardboard to size for your template. For an A7 envelope, your template should be 5 and 1/4" by 7 and 1/4". For a six inch square, your template should be 6 and 1/4". It us fine if you cut your slightly smaller, just do not go any larger.
Step2:
Place your doily pretty side down with your template centered on the doily.
{:~:} TIP
Look for the embossing to see which is the correct face to place down.
Step 3:
Fold the side flaps to the center, snugly. Then use your bone folder to press the folded edge down firmly. Your goal is to ensure the crease will stay, but not to tear the delicate doily.
{:~:} TIP
You can use the rounded handle end of a dinner knife in lieu of the bone folder.
Step 4:
Fold the bottom flap up to meet the side flaps and, again, use the bone folder to press the folded edge down firmly.
Step 5:
Fold the top flap down to meet the bottom flap and press with the bone folder.
Step 6:
Open the top flap back and bottom flaps back to add the double stick tape, or the envelope adhesive to the points of the side flaps. Add the adhesive to a location where the most solid pieces meet. Arrows are for suggested adhesive placement.
{:~:} TIP
If you are using envelope adhesive or Elmer's glue, add a hair dryer to your tools. The glue takes about a minute to dry and the dryer will speed that time up.
Step 7:
Slide the template carefully out of the envelope and close the top flap! You have completed one envelope.
Step 8:
Now that you have an envelope, it is time for a dry run. Try to slide your invitation inside the envelope and then to slide the envelope into the outer envelope.
Was the envelope too snug or too loose? You can adjust the template for either by trimming or adding tape to each edge to slightly enlarge it.
If you feel the doily is too delicate, you can start with a 10-inch square of velum on the inside of the doily (between the doily and the template) and follow the above steps. Just make sure you stick the velum to the doily in the adhesive step.
Now that everything works, cut a duplicate templates and invite those bridesmaids over to help fold the rest of those envelopes.
Did you discover a tip you would like to share on this project? Please add it in the comment section!
The Basic Paper Doily Envelope Liner
Supplies needed-

10 inch doilies
a cutting tool (I used my fave vintage paper cutter purchased from Etsy)
a bone folder (for creasing paper)
card board
a type of adhesive (double stick tape, envelope glue)
The bone folder is the small tool on the top. My doilies always include two sheets of the cardboard I have used in this post as protective packaging. So, if you order my doilies, you get the cardboard that you can cut down to the size you need. You could also use a cereal box, but be careful not to transfer the ink to the doily when you are using the bone folder.
{:~:} TIP
10 inch doilies can be used for an A7 invitation (5" x 7") or a 6" square invitation. Both sizes follow the same method so for illustrative purposes, I'm only showing the A7 size.
Step 1:
Cut the cardboard to size for your template. For an A7 envelope, your template should be 5 and 1/4" by 7 and 1/4". For a six inch square, your template should be 6 and 1/4". It us fine if you cut your slightly smaller, just do not go any larger.
Step2:
Place your doily pretty side down with your template centered on the doily.
{:~:} TIP
Look for the embossing to see which is the correct face to place down.
Face down with template
Note that the space for "a" and the space for "b" are equal.
Step 3:
Fold the side flaps to the center, snugly. Then use your bone folder to press the folded edge down firmly. Your goal is to ensure the crease will stay, but not to tear the delicate doily.
It does not matter which side you fold from first.
Firming press the folded edge with the bone folder.
{:~:} TIP
You can use the rounded handle end of a dinner knife in lieu of the bone folder.
Step 4:
Fold the bottom flap up to meet the side flaps and, again, use the bone folder to press the folded edge down firmly.
Step 5:
Fold the top flap down to meet the bottom flap and press with the bone folder.
Step 6:
Open the top flap back and bottom flaps back to add the double stick tape, or the envelope adhesive to the points of the side flaps. Add the adhesive to a location where the most solid pieces meet. Arrows are for suggested adhesive placement.
{:~:} TIP
If you are using envelope adhesive or Elmer's glue, add a hair dryer to your tools. The glue takes about a minute to dry and the dryer will speed that time up.
Step 7:
Slide the template carefully out of the envelope and close the top flap! You have completed one envelope.
Step 8:
Now that you have an envelope, it is time for a dry run. Try to slide your invitation inside the envelope and then to slide the envelope into the outer envelope.
Was the envelope too snug or too loose? You can adjust the template for either by trimming or adding tape to each edge to slightly enlarge it.
If you feel the doily is too delicate, you can start with a 10-inch square of velum on the inside of the doily (between the doily and the template) and follow the above steps. Just make sure you stick the velum to the doily in the adhesive step.
Now that everything works, cut a duplicate templates and invite those bridesmaids over to help fold the rest of those envelopes.
Did you discover a tip you would like to share on this project? Please add it in the comment section!
I'll let you in on a secret...
So, I love secret pin boards on Pinterest. It is where I store all the great ideas that I want to interpret into my own style. I am working on my Halloween shop design, as I type, and I thought I would share a couple of ideas I plan to interpret in my shop in Interiors and Antiques in Vestavia Hills.
The first comes from Sagebrush Ridge and is a pumpkin from a book. I am interpreting into different shaped pumpkins and I think I will be doing silver wood stems and silver pages with silver vintage German glitter.

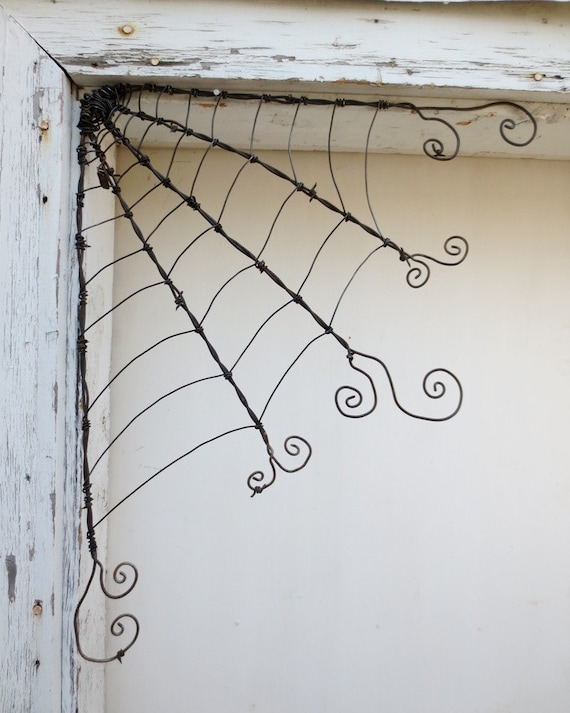
This item is actually for sale on Etsy from The Dusty Raven, love the shop name. I love the concept of the corner spider web. I'm thinking silver, not barbed wire, less Tim Burton-ish and probably a wire spider that hangs low from the web.
A few years ago, when I was a corporate librarian, I decorated a library space for Halloween with waves of bats circling the main reading room. The image below reminded me of that space. (It is actually Martha Stewart's bat mobile) I will definitely be doing the walls in wave of bats in the shop. I'm thinking the look will be like the Bat Cave in the Devil's Sinkhole State Natural in Texas where the bats emerge from at dusk most of the year.

What are you storing, secretly, on Pinterest?
The first comes from Sagebrush Ridge and is a pumpkin from a book. I am interpreting into different shaped pumpkins and I think I will be doing silver wood stems and silver pages with silver vintage German glitter.

This item is actually for sale on Etsy from The Dusty Raven, love the shop name. I love the concept of the corner spider web. I'm thinking silver, not barbed wire, less Tim Burton-ish and probably a wire spider that hangs low from the web.

A few years ago, when I was a corporate librarian, I decorated a library space for Halloween with waves of bats circling the main reading room. The image below reminded me of that space. (It is actually Martha Stewart's bat mobile) I will definitely be doing the walls in wave of bats in the shop. I'm thinking the look will be like the Bat Cave in the Devil's Sinkhole State Natural in Texas where the bats emerge from at dusk most of the year.

What are you storing, secretly, on Pinterest?
Labels:
antiques,
bats,
decorating,
DIY,
Halloween,
interior design,
interiors and antiques,
laurl designs,
pin board,
pinterest,
pumpkins,
secret,
shopping,
spider webs
Saturday, August 10, 2013
Fave of the weekend picking... Hollywood Regency lamp- understated
Though I love the new desk that I just added to the shop... which I stalked, plotted, staked out and woke up really early for, this lamp is my favorite pick. I don't know who made it; I have no history on it. It is just good design in a solid Hollywood Regency package.
Love the black shade on the white ceramic base and the scale of the shade. Nice pagoda shape, bas-relief bells, or maybe it is tassels, and the faux bamboo details. The two bulb lamp has parallel sockets, which allows for the shallow shade.
Love the black shade on the white ceramic base and the scale of the shade. Nice pagoda shape, bas-relief bells, or maybe it is tassels, and the faux bamboo details. The two bulb lamp has parallel sockets, which allows for the shallow shade.
Close-up of the bamboo and bell details.
New items in the shop- The back to school edition
Just added a fantastic desk (vintage Drexel), vintage luggage train rack, end table/ nightstand (also vintage Drexel) and did some fluffing. Here's the new vignettes.
A study in cream and light sage- pretty cream chair (actually a pair is available), fantastic nightstand with a custom cut glass top, a brass lamp that sold for twice my price on One King's Lane, and the vintage brass luggage rack from a train that is storing pillows.
Lovely vintage French Provincial writing desk from Drexel. Nice desk with a little brass rail that surround the back. I added a vintage Drexel side chair and an awesome vintage typewriter.
For the details of the space-
Vintage side tables for Bromberg's Studios. They used to have custom furniture made of them. There are a pair of these tables and they are weighted- a well thought out design feature.
Really nice end table of nightstand from Drexel. A great shade of creamy same with gold detailing. It's the best of neo-rococo from the 1950's. I think the glass top, custom shaped, is a very nice high end detail.
Brass luggage rack from a train would work well in a kitchen/ mud room for holding hats, bags, coats. etc. Or, it would be great in a bathroom to hold towels.
It even comes with extra hooks which fit on the top rails.
All of these items are currently available at Interiors and Antiques in Vestavia Hills... in the old Ethan Allen building! Great location, tons of ideas.
Now, what does all this have to do with back to school? The desk is a great study area, the night stand is a great way to update a child's bedroom and offer storage for books, kindles, etc. and the Train luggage rack, I think would be a great gift for mom to keep the jacket's and other cold weather gear from piling up at the back door!
Subscribe to:
Posts (Atom)


